Need Help? Call Us 415-423-3313
  • Welcome to The Upholster.com Forum. Please login or sign up.
 
April 29, 2024, 01:35:48 am

News:

Welcome to our new upholstery forum with an updated theme and improved functionality. We welcome your comments and questions to our forum! Visit our main website, Upholster.com, for our extensive supply of upholstery products, instructional information and videos, and much more.


Show posts

This section allows you to view all posts made by this member. Note that you can only see posts made in areas you currently have access to.

Topics - hdflame

41
Hey everybody, I want to make a cover for my new charcoal/wood/smoker/grill.

I have some 1000 denier Cordura rubber backed that I use to make the Sun Stoppers I sell.  I buy it pretty cheap off eBay and I know it's seconds but I don't know if it's nylon, poly, or if there's any UV protection.

Here's my question, I don't want to use anything expensive, but I don't want to have to make another in 6 months either.  Should I make a cover from this Cordura or order some cheap marine vinyl and use it?  I want it to be waterproof.
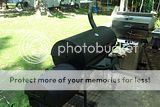

It's the black one.
42
The "JUNK" Room / Let's see what ya got!
June 04, 2010, 06:24:44 am
When you post in here, try to  put in pictures with good explanations of what is wrong, and if you got it, an example of your work done the right way...if possible.

Make a new post for each category, rather than just adding to this thread.  That way we'll keep marine with marine and auto with auto, etc., etc.

This could be fun! ;D

43
I was reading a how-to cover a truck bench seat and the author said he uses a Fisher R80SL Silver ink pen for marking on vinyl, leather, and ultraleather.  He said you could mark on the top side and it was easily cleaned off!

Sounded good to me, so....I went online and ordered 3 to try out.  Check out this link and let me know what you think.

He talks about it in post #8.
http://www.hotrodders.com/forum/truck-seat-upholstery-tutorial-118011.html?s=6929f32b0c57fef93fa87dd9b4414bf7

44
This area is for questions about "How to Use This Forum" ONLY

If you have a question about upholstery, please post it in the appropriate area of the forum.  You will get your answer much quicker that way.

All posts made in this area that are not about "How to Use This Forum" will be deleted.

Thanks for your cooperation.

45
I originally sent this to KineticComfort, but thought I would post it for the benefit of anyone who needs a little help posting pictures of all those awesome upholstery jobs!  A little bit selfish, since I like to see them too!  

If anyone wants to add their suggestions, feel free!  Here it is.

Here's what I do:

We like BIG pictures, so make sure you use the "IMG Thumb" option so that we can click on the picture for a BIGGER picture to L@@K at details.

1.   Go to www.photobucket.com and open a free account.

2.   Save the picture you want to upload in a folder that is easy to find in your "My Pictures" folder.  I usually make a folder labeled "Sewing" or "Upholstery" then put subfolders of each project to make them easy to find, i.e in your case one labeled "Motorcycle Seats".

3.   Sign into your photobucket account and click on the "upload images and video" button.  It's a big blue button.  It will bring up a screen that allows  you to navigate to the folder you have saved on your computer. Hint: If you're uploading more than one pic to photobucket you can select the first pic by left clicking on the file, then to select more pics, hold down the "Shift" key on your keyboard while left clicking the last picture in the folder that you want, all of the pictures from the first to the last will be selected.  If you want to pick and choose your pictures, click each picture while holding the "Ctrl" button.  Only the pictures you click on while holding "Ctrl" will be selected.  I don't usually try to upload more than 5 or 6 at a time because it takes longer.

4.   After uploading your pics, and by the way, you can make folders on photobucket to store your pictures and make them easier to find and view later.  Plus if you have all of the pics of the same topic saved in the same folder, you have the option of sharing the entire folder with friends.  Back to posting your pics....When you sign in you'll see a link at the top that says "my albums", when your cursor goes over it, there will be several links drop down, go to "albums and upload".  On the left side you will see all of the albums you've created or if you just uploaded without making an album they'll show up on that page.

5.   On photobucket you have the HTML code automatically generated for you below each picture.  The one I use on the upholstery site is labeled "IMG Thumb".  Copy and paste that code in your post on the site.  

6.   For each picture you add, copy and paste the code in the post.  I usually hit enter each time, so I drop down to the next line in the post for the new image code.  You can preview your post before posting to the site to make sure it's like you want.

7.   If you want, after posting each image code, hit enter to drop down to another line, and add a caption to tell about each picture as you upload.  Trust me, do this each time because it's much easier to add a caption after each picture than trying to go back into the HTML code later and find the right place to insert it.  HTML code has to be very specific.  If you screw it up, you'll just wind up seeing the code in the post rather than the picture you want it to point to.

Here's a picture thumb so you can see how it would look.  You can click on the picture for a bigger picture in photobucket.


Hope this helps,
Bobby