Need Help? Call Us 415-423-3313
  • Welcome to The Upholster.com Forum. Please login or sign up.
 
April 29, 2024, 06:28:44 am

News:

Welcome to our new upholstery forum with an updated theme and improved functionality. We welcome your comments and questions to our forum! Visit our main website, Upholster.com, for our extensive supply of upholstery products, instructional information and videos, and much more.


Show posts

This section allows you to view all posts made by this member. Note that you can only see posts made in areas you currently have access to.
Topics - hdflame

21
Here's a picture of the kind of camo I'm looking for.  I would like to find it in 1000 denier urethane backed Cordura or something similar.

I have looked high and low!  Does anyone have a source?


23
General Discussion / Dremel Trio??
December 25, 2010, 09:29:17 am
Did anyone get the new Dremel Trio for Christmas?  I just saw it on TV.  Looks like it could be a useful tool in the shop.

They also have their version of the new multi-tool that you see everywhere.  I've thought about getting one of the knock-offs from HF.  We've discussed it on here before.


24
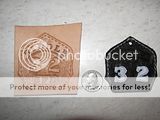
I've been teaching myself a little leather working to incorporate into my upholstery.  I wanted to make the guys at the fire station something different for Christmas.   I wanted to give them  something personal this year, instead of the usual flashlight or tape measure. ;D

So I decided to make them all a leather key fob that looks like a fire helmet shield with their name and number on it.  I did several prototypes for myself and learned from each one.  This is what I came up with.  I already have some changes in mind for the next ones.


Some first attempts...just practicing.


Here's one almost finished.


Here's the one I finished for me.  I want to improve my coloring and outline the letters with contrasting colors next time.

25
I wanted to try using a cheap Harbor Freight spray gun to spray contact cement with, but I didn't have the Spray gun formula, which is thinner.

So, I went to Lowe's Home Improvement and bought a gallon of Weldwood.  It sprayed, but not very good.  It splattered more than sprayed.  So I ordered a gallon of the Weldwood Landau Top and Trim Spray Grade.

I wanted to try to thin what I had and try it before I removed it from the gun.  So I added some mineral spirits to my gun to thin it some.  When I poured it in, it just made a goopy ball of glue!  I cleaned out the cup REAL good to remove any leftover glue and am starting with fresh Landau glue.

Here's my question.  What can you use to clean/thin contact cement with?  What can I spray through the gun to clean it out, without running the risk of globbing up the inside of the gun?

Any suggestions?  Yes, this is a cheap gun, but I'd like to get my moneys worth out of it and would like to occasionally clean it.

26
http://www.youtube.com/watch?v=lHhlHbUYwV8&feature=recentu

I just wanted to share this video.  Good close-ups.  Most of you have probably seen other videos from Cesar.  He's from Mexico and joined this site a few months ago, but hasn't posted much.

Everybody have a good Thanksgiving!

27
Hey everybody!  Haven't been reading on here as much lately.  Been fighting laptop troubles, but have it back up and running now!

I just got a new paint spray gun on sale at Harbor Freight and want to get away from using those expensive aerosol cans of glue.

Since I'm not a high volume glue user, I was hoping that I could buy one glue to cover most projects and just leave it in the glue gun.

I will be gluing foam, vinyl, and maybe some applications like headliners, so I need high heat resistance.  I'm thinking either Weldwood or HH66 for all of my jobs.

Anyone have a preference for these two glues?  Am I on the right track with my choices?  Any other recommendations or specific glues that you'd recommend?  Any specific Weldwood product?

28
Just wanted to give a special thanks to Mike for the awesome material yardage and sample books that he sent!  Also sent me a couple of nice t-shirts too!

Just wanted to share some of the finished pics of what I was using the material for.  It is what's called a lap robe.  This is basically an old school piece of riding gear that was first used (I think) in sleighs and carriages during the cold winter months.  Later they were adapted to motorcycles but are not as frequently used today, so that makes them hard to find.

Here's some info on mine.

This is not a Lap Robe that is intended for just year round rain protection.  It is intended for extreme cold weather riding only, due to it's heavy quilted construction it would be too hot for warmer temps.  With the quilted model, you could basically just wear regular street pants in the winter on short rides.  As seen in the pictures, it also extends high up on the front of the chest for extra wind protection.  I also have this same style with a single layer, except for double layer in wear areas, that would be more suitable for normal cold weather riding days.


Lap Robe installed and draped over the seat.


Lap Robe attached around rider.  Your coat should be placed over the top of the lap robe.


Complete coverage all the way down your legs and boots.


3 inch wide belt wraps around your waist and attaches with Velcro.


View from bottom side with the lap robe thrown forward, out of the way for mounting your bike.

Here's some more pictures of details.


Here, you can see the backside of the top material.  This is the flap that you tuck under your butt to help hold the lap robe in place.  This is the only place that I left a single layer of material.  Leaving the rubberized backing exposed, helps it grip to your bottom side while sitting on it.  You can also see a close up of the 1000 denier Cordura and Marine top material for comparison.


2 inch wide heavy duty Velcro.


Extra wide 3 inch belt.


Reinforcement sewn around the attachment point.


This is the seat flap hanging down so you can see it.


Attached in front of carbs.


As seen from the bottom side.

Here is a link  to view all of the pictures in this album.
http://smg.photobucket.com/albums/v646/HDFlame/Upholstery/Ural%20Lap%20Robe/

29
I just happened to run across some markers and wondered if they might be useful in our line of work.  They're pretty neat, and there's video on this link that shows them being used.

I haven't found anything about using them on material, but I would think they would work on vinyl or clear vinyl like the marine/auto people use for windows.

http://www.chalkink.com/ChalkInk.com/Homepage.html

Tell me what you think.

30
The below info came from:
http://www.questoutfitters.com/zippers.htm#ZIPPER TIPS & INFO

There are pictures there which didn't copy here.


ZIPPER TIPS & INFO
     EVERYTHING YOU ALWAYS WANTED TO
     KNOW ABOUT ZIPPERS

COIL more flexible and smoother running than tooth zippers.
As a general rule, typically the #5 is for clothing and the
#7 & #8 are used for gear. Uses: tents, jackets, luggage                                       

TOOTH SIZE the smaller the number the smaller the tooth
size: ie. #5 is smaller than #10 and thus not as strong.                                                         

TOOTH SIZE the smaller the number the smaller the tooth
size: ie. #5 is smaller than #10 and thus not as strong.

CONTINUOUS ZIPPER a length of zipper, either coil or
tooth style, sold by the yard. Allows you to make and
customize your own zippers. At least one end must be
sewn closed. It cannot be used to make separating
jacket zippers.

ZIPPER TAB the zipper pull (slider) on the zipper [Note:
the zipper tabs from one brand (ie: YKK brand) are
usually not interchangeable with other zipper brands
(ie: Maxi brand zippers, etc.)

(1) single tab-a zipper tab with only one pull     


(2) double-reversible tab-a zipper tab with a pull on both sides of the tab. Uses: sleeping bags 


(3) non-locking tab(NL)-a zipper tab which slides easily and
has no internal locking mechanism to hold it in
place. Uses: pockets, luggage, tent doors

(4) locking tab(L)-a coil zipper tab which has an internal
locking mechanism to hold the tab in place
ie. trouser zipper

(5) key locking tab(KL)-a zipper tabs which locks and
unlocks with a removable key. Uses:security
envelopes, luggage


WHAT'S THE DIFFERENCE BETWEEN
TOOTH & COIL STYLE ZIPPERS?

For many projects it's your preference which style you choose

TOOTH STYLE
has individual blocks of teeth.


COIL STYLE
has continuous wrap of
nylon filament


ZIPPER ANATOMY


WHY MAKE YOUR OWN ZIPPERS:

There are a number of reasons why you would want to make your own zipper using continuous coil or continuous tooth zipper length.

1. By doing so you can customize the length and style of the zipper you want ie: one way non-separating, two-way non-separating or one-end-closed. [NOTE: The only style of zipper you cannot make with continuous zipper is a one-way or a two-way separating zipper-like a jacket style zipper].

2. When you make your own zipper you can select the style of zipper tab you desire: non-locking, locking, key locking or double reversible. See the zipper terms box to determine which style of tab to use.

3. Often times it is more economical to make your own. To determine how much to buy just add 2" to the desired length you want the zipper to be (1" extra for each end) ie: if you want a 70" zipper you will need at least 72" of continuous zipper.


SHOULD YOU USE TOP & BOTTOM STOPS:

Top and bottom stops can be optional. The purpose of zipper stops is to keep the zipper tab from pulling off when the zipper is in use. If an end of the zipper is sewn into a seam you may choose not to attach top/bottom stops because the seam will act as the "stops". When using zipper stops, bottom stops are attached to one end of a one end closed zipper and both ends of a one or two-way non-separating zipper. Top stops are used at the top end (the "open" end) of a one-end closed zipper.


WHAT SIZE TOP & BOTTOM STOPS SHOULD YOU USE:

For #5 and #8 coil and #5 tooth zipper use #8 top and bottom stops. For #10 coil and #10 tooth zipper use #10 top and bottom stops.

               
  HOW TO ATTACH A ZIPPER TAB
1). On one end of the zipper tape, part the zipper teeth about 2".   
2). Insert one side of the zipper about 1/4 " into the curved end
of the zipper slider.


[NOTE: On double pull sliders place the
slider so that the angled portion of the
flange is up].


3). Insert the other end of the zipper into the slider. To prevent
misalignment on the other end of the zipper line up the short ends
of the zipper tape evenly.


4). Firmly holding both zipper halves slide the pull onto the
zipper teeth. It may take several attempts to line up the zipper
teeth and to prevent a bulge on one side of the zipper tape if the
teeth are misaligned.
[NOTE: When putting two pulls on the same zipper tape, attach the
second tab on the opposite end of the zipper tape using the same
method as above].
                 
  ZIPPER FAILURE
Zipper failures are usually the result of the zipper tab (slider) wearing out, especially if no apparent damage is noticeable to the zipper teeth. For zippers where the teeth separate after the zipper is closed, a possible solution (though at times only a temporary one) is to pinch the tab from the top of the tab to the bottom of the tab with a pair of pliers to seat the tab closer to the zipper teeth (not too light though).
If this doesn't work try replacing the tab before replacing the entire zipper.

                     
ZIPPER WEDGES

The following method works well to eliminate the bulk when installing zippers in a seam...

Cut the length of zipper needed for the project minus 2" (ie. for a 25" zipper cut a 23" length of zipper. Install zipper slider(s).
Cut 2 zipper wedges out of project fabric, 2" long by width of zipper tape.

On each end of zipper, pin each zipper wedge face side down to right side of zipper matching short raw edges.

Using a zipper foot, stitch 1/2" from raw edge.

Fold zipper wedge out flat & top stitch 1/4" from edge with zipper foot.

Install in project.
C
  HOW TO SHORTEN A ZIPPER

       COIL STYLE ZIPPER:

1. Determine the final length you want the zipper to be.   At the top end of the zipper place a mark at this measurement (Mark #1).   Place another mark (Mark #2) 1" above Mark #1.


2. With the zipper pull below Mark #1 trim both sides of the zipper at Mark #2.  Using a match or candle sear the raw edges of the zipper tape to prevent raveling.

3. Finishing the end:

     METHOD #1: Between Mark #1 and Mark #2, using nail clippers or scissors remove the zipper teeth being careful not to cut into the fabric portion of the zipper tape.  Remove any small plastic parts remaining in this area.

            a.  Remove the two top stops from the zipper pieces that were removed in step 2 (if this is not possible because the zipper stops are plastic or if you are unable to remove them go on to step b.)   Reattach the stops on the zipper placing each over the first few teeth (or if this is not possible as close to the top tooth as possible).  Using a pair of pliers crimp each in place.  The zipper is now ready to be installed.

                 If the zipper stops are plastic or if you are unable to remove them go to the next step (b).

            b.  To keep the zipper pulls from coming off stitch across the top few zipper teeth on both sides of the zipper tape, using a tight zig-zag stitch and stitching in place numerous times.   (NOTE: set the zig-zag stitch width wide enough so that the needle passes freely across the teeth).  The zipper is now ready to be installed.


METHOD #2:  At Mark #1 fold the extra 1" portion of the zipper tape toward the bank and slightly off to the side of the zipper.   Pin.  Stitch to secure the folded edge in place.  The zipper is now ready to be installed.


          TOOTH STYLE ZIPPER:

Method #1: Follow steps 1 through 3a above and if necessary Method 2 below.  [NOTE: in removing the zipper teeth on a tooth zipper pliers may be used to pull the teeth off.  Also, when reattaching the top stops place the stop immediately above the top tooth not over it.]

METHOD #2:  At mark #1 fold the extra 1" portion of the zipper tape toward the back and off to the side of the zipper immediately above the last tooth, making certain there is no space.  Pin in place.  Stitch to secure the folded edge in place. 


The zipper is now ready to install.

31
OK, I told you guys about a lap robe that I was making for use on a sidecar rig.  I have some 1000 denier urethane backed Cordura, but the urethane backing is not very good.  I know it's not going to be waterproof, so I got to thinking, why not contact cement some regular roll plastic poly (Like from Lowe's or Home Depot) on the backside?  It's going to be sandwiched between another layer of Cordura on the outside anyway.

I was thinking of using 4 mil, but I think 2 mil should work fine and be less bulk.  I was going to wait till I had the two sides sewed up, then glue the poly on the back side of the top and bottom piece.  Some of these will also get a layer of Dacron padding between the top and bottom layers for extra warmth.  Then the two layers will be sewn together around the perimeter.  Haven't decided if I will run any sew lines across it to quilt the Dacron in place??

What do you guys think?  The poly is not going to be exposed.  Do you think it will stick OK and hold up?  The reason for glueing was to make the Cordura waterproof and to prevent water from getting between the layers and not drying out good.

I'm planning on changing to a different material when this is used up, but hated to waste this if the poly will work.

Tell me what you think?????
32
Been thinking about going with my own webpage registered in my business name, so I went to Go Daddy's and registered www.riddlescustomupholstery.com.  I don't have it hosted yet, but at least I know that nobody else could register it.  Thought I would start working on my own site so I can incorporate it into my advertising, i.e. business cards, or what ever.  Looks like pretty much every legitimate business has their own site these days....or at least people expect you to.

Anyone else starting up a site or thinking about it?

33
I covered my chair that I use at my sewing machine with some VANGUARD/ OSTRICH because I liked the looks of it and was thinking about doing my truck seats in the Rust color.


Here's the problem.  I sweat terribly when sitting on the chair!  I'm scared that it will be too hot and sweaty in my truck.

Does anybody have any thoughts on this, or suggestions for an alternate material?  I like the leather look, but don't know if I want to spend the extra bucks for "REAL" leather for my truck seats??

Even though I like the looks of the Ostrich, I'm hesitant about using it now.  Is there another good looking vinyl that you would recommend?  I REALLY wanted the Ostrich so I would have something different, and I thought it would be a rolling ad for my work.  What's everybody think?  Just go ahead and do it, and if I don't like it, change it out for practice?

Thanks.
34
I just watched a video on You tube.  If we get some good info I'll make a post in the newbie area that has all the info about seams.  There are two video links for you to watch.

I would appreciate making comments and suggestions about the seams in that thread.  That way if we gat some good info from our experienced stitchers, it'll all be in one place! ;D

Here's the link to the thread and videos:
http://get-up-and-go.com/upholstery-forum/index.php?topic=8723.0


I would like to hear some comments about the "Full Flat Felled Seam".  That is the last seam that he shows, second video.  I haven't seen that one before, but figured that our marine people could give more info about it.

35
I'm making something for a motorcycle called a "lap robe".  It's similar to what you see in pictures of people riding in sleighs in the snow.  It will be used when riding a sidecar rig in the winter, when it's cold and rainy.

I want something that is heavy and waterproof.  The urethane backed Cordura that I've tried, just isn't heavy enough.  The urethane backing is too thin.  If I hold it up to the light, I can see through it.

Isn't there some marine material similar to Sunbrella, that has a heavy rubber/urethane type backing that will be wind and rain proof and hold up good outside in harsh conditions?

What should I use to make these out of?  I don't have any samples of marine material.
36
I ran across an application for Plasti Dip that I didn't know about and wanted to share with everyone.  I know there's been discussion on seams leaking before and trying to find a solution.  Well, this looks like it.

http://www.plastidip.com/industrial_solutions/Plastiseam

I was looking to use it for a totally different reason, but thought this might help some of you out.  There is no pricing on their site, so I emailed them for wholesale pricing.  I'll share that when I find out. ;D


37
General Discussion / Help me stop the spammers!
July 22, 2010, 06:45:59 am
Hey guys and gals,

Just checked this morning and we had 18 people (spammers ?) wanting to join the site.  Yesterday there were 8.

What I'm trying now is requiring new members to activate their account.  If this doesn't stop the spammers I have one other option.  I will require EACH one to answer a question about why they want to join the site.

If anyone sees any spam, please click on the "notify" button so I'll be sure to know if this is working.  I'm determined to stop some of this junk from getting through!  Hopefully ALL of it.
38
I just bought a 16 oz spray bottle of this to try on some "Waterproof Cordura" that was not really waterproof!  I have not had a chance to see how it performs yet.

I was also under the impression that it had UV protection too but I don't see it listed on the bottle.

Has anyone used this and could give me your opinion?

Is there any other product that you are using that you like for water proof and UV protection?
39
I'm not actually working with Sunbrella, but I'm using some 1000 denier Cordura that is very similar in weight.  I need some advice on the type of edge binder and what kind of tape to use to finish the edge of the Cordura.  The Cordura is black.

Any suggestions on where to get the binder and edge tape?  Thanks.

I'm thinking that it would be something like this, but I don't think this one is for heavy material.  The material will be used on a motorcycle project, so I need something for outside applications.

40
I found some tonneau material for a REALLY good price, but now I can't find it.  Seems like it was a supplier that I didn't expect to have it.

Anybody got any links to some heavy black with good leather look finish?  I did a search but couldn't find what I needed.